
I’ve been hinting at this ceiling project for a while and wanting to make our ceilings more custom to our home! A few months ago we opened the ceilings in the entire main floor of our house which you can read about [HERE]. And while I love the open concept ceilings I decided I wanted something a little more custom. Which led to our newest project updating our ceilings!
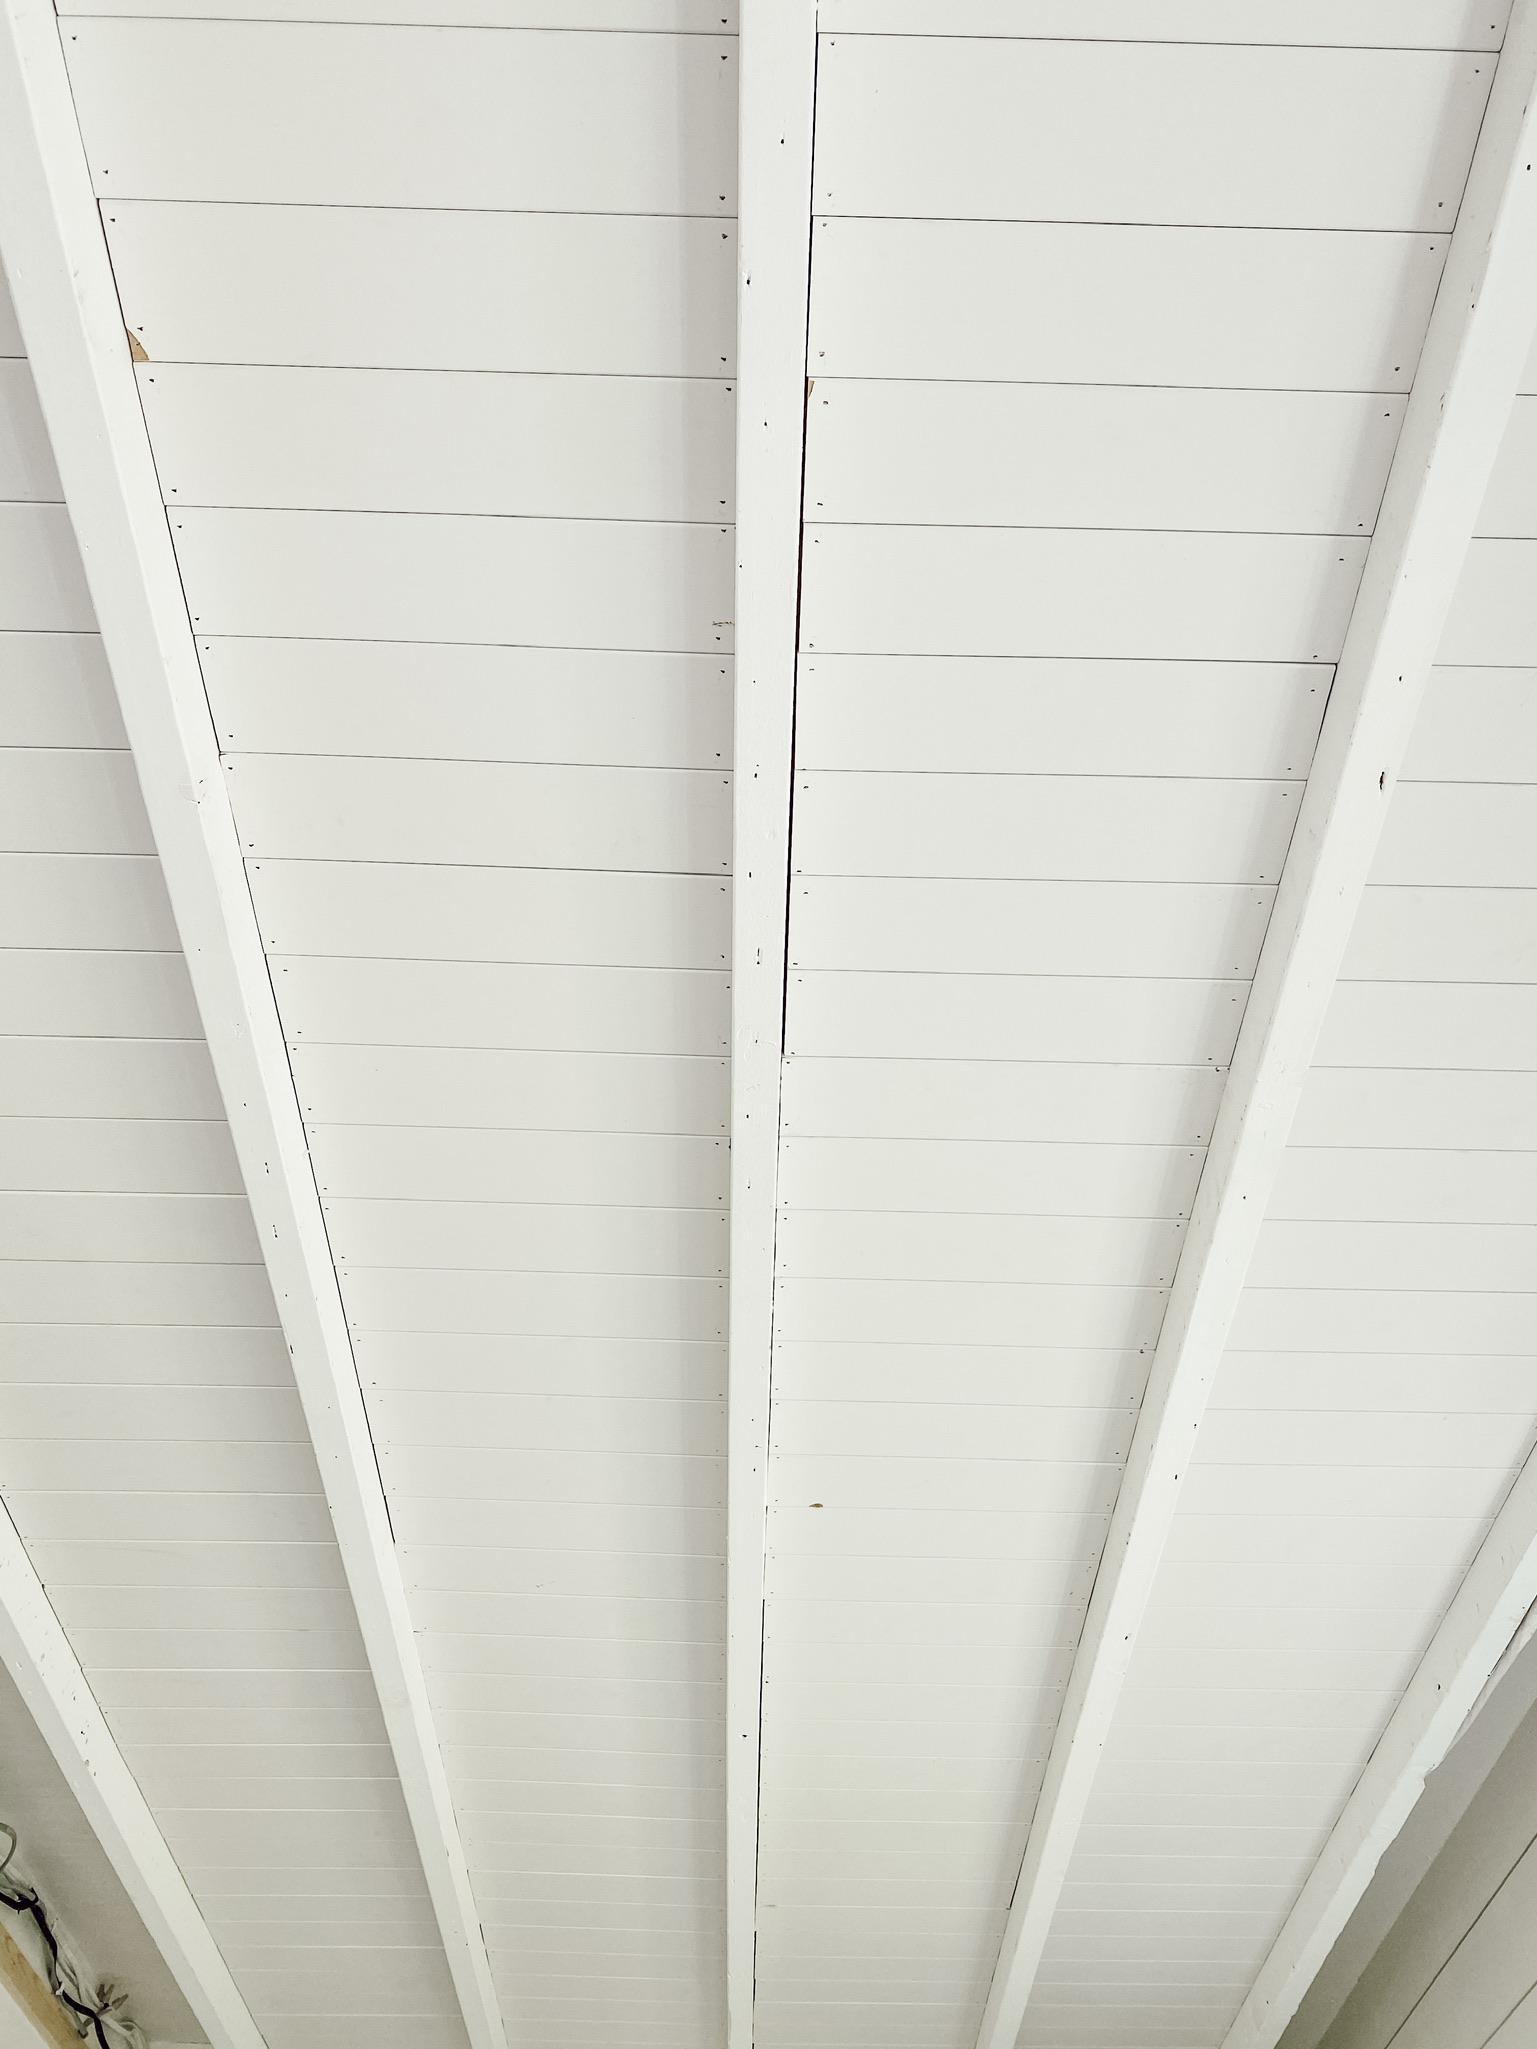
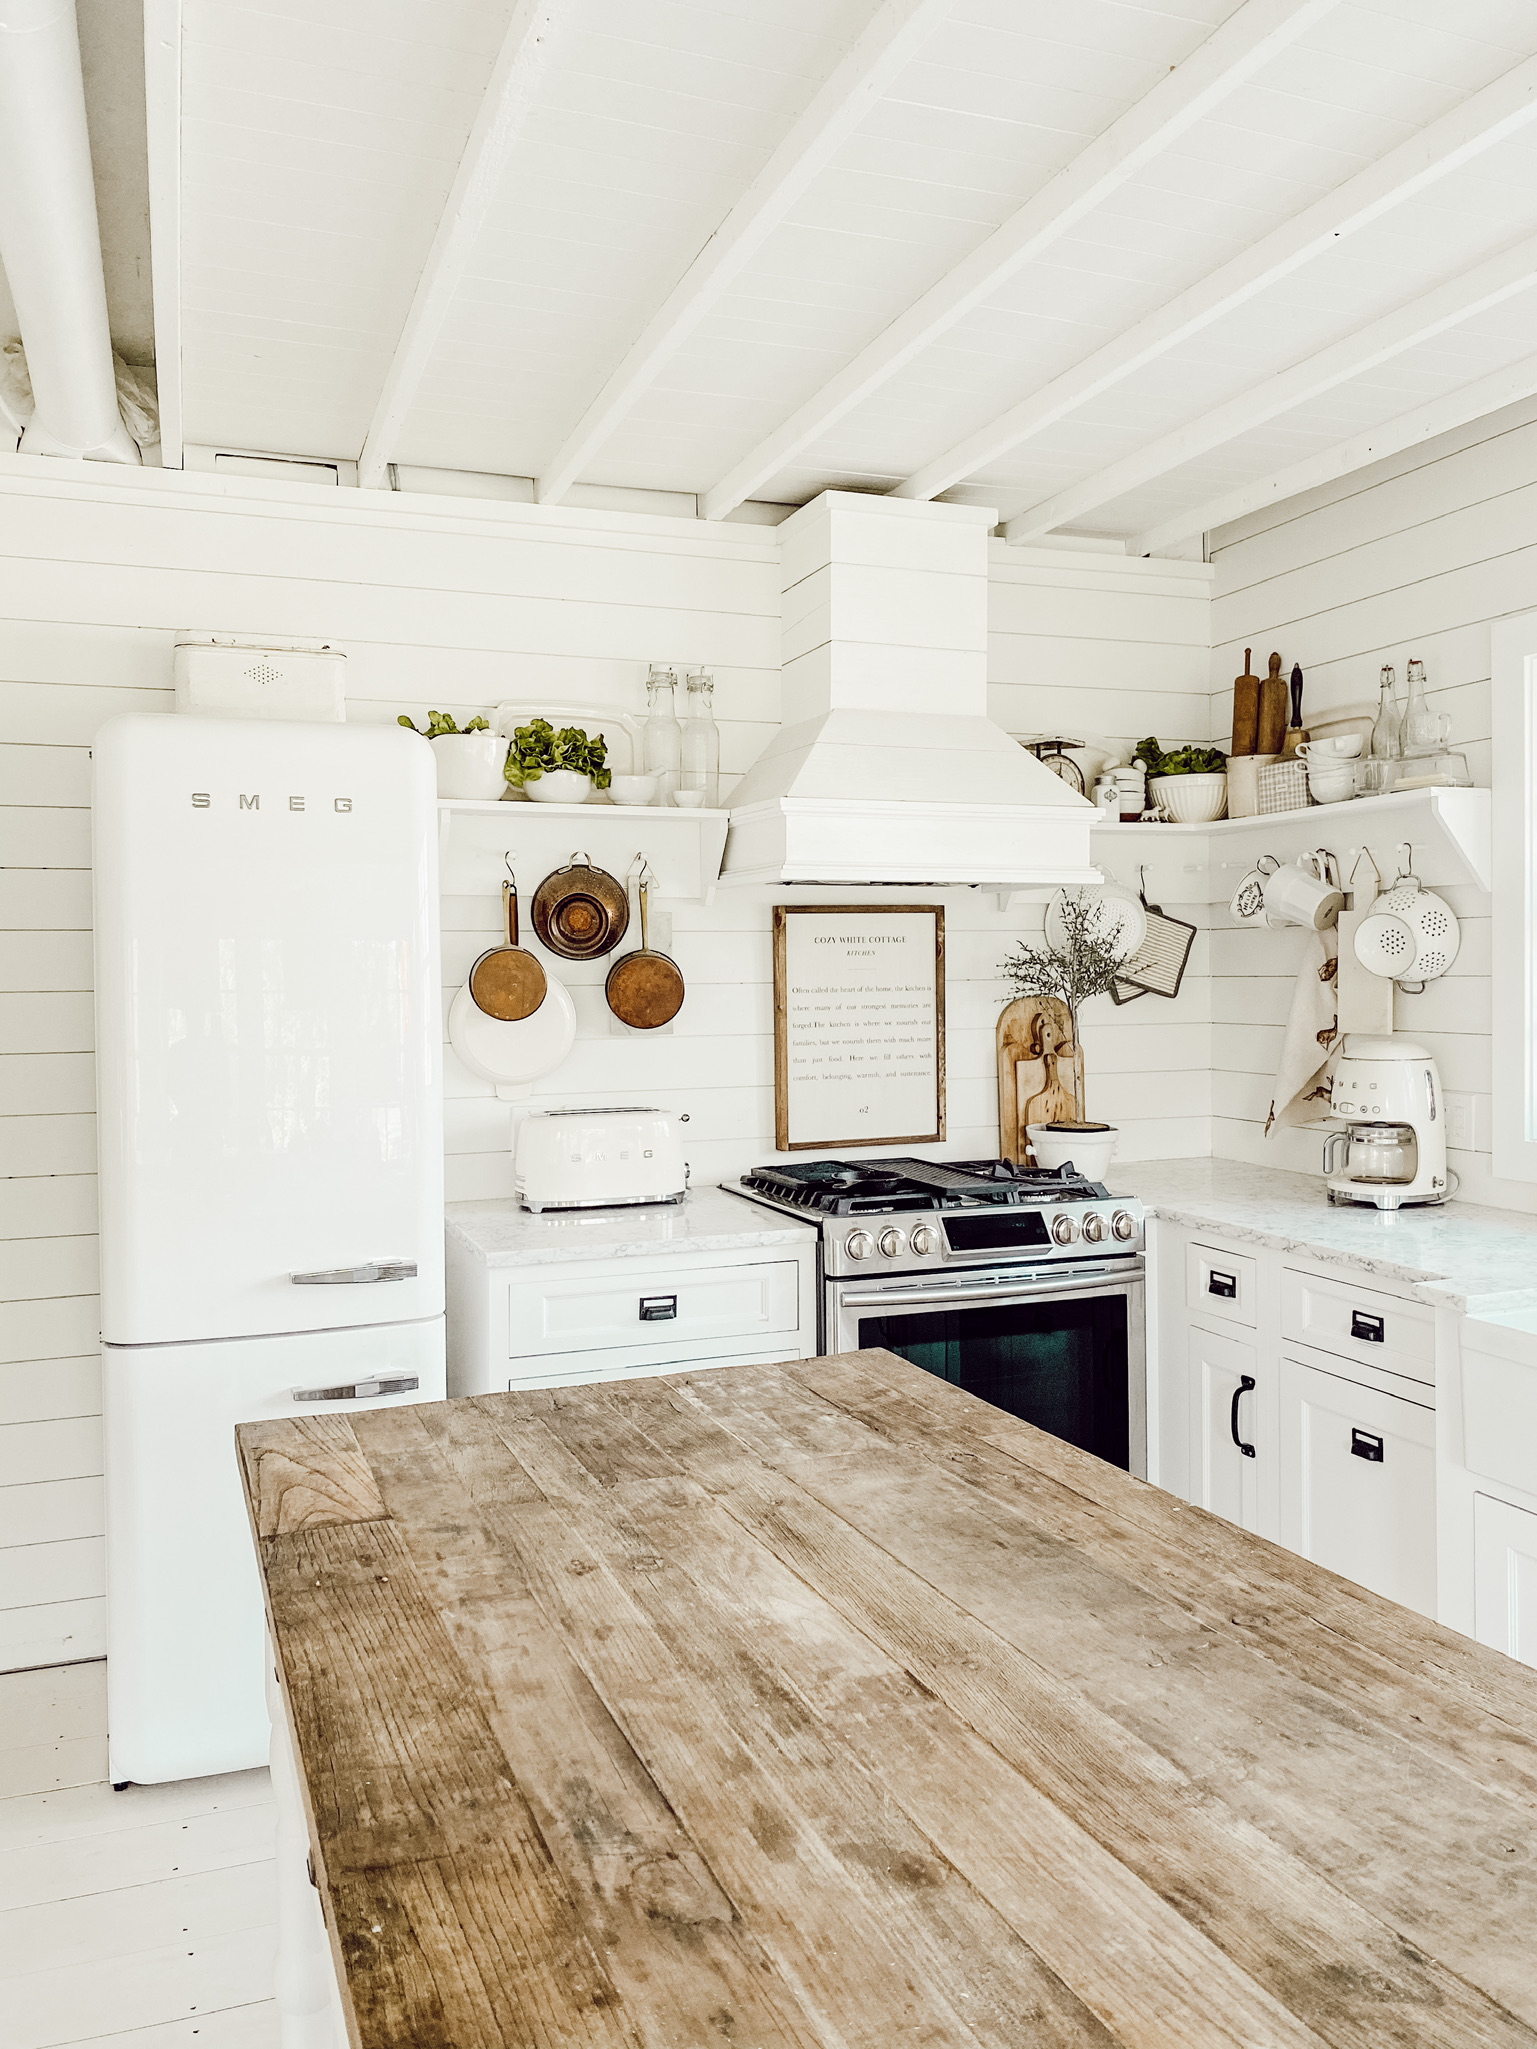
One of our main goals is to bring historic elements back into our farmhouse. Since I can remember, even when I was very young, I would find elements of design everywhere I went, mentally redecorating spaces with my own touch or locking away design elements I wanted to put in my home. It is no secret how much I love visiting Mackinac Island, and I recently shared a booked that showcases some of the cool homes they have on the island. A lot of homes on the island have exposed ceilings, similar to ours, but it reveals the underside of the floors above. Having exposed our ceiling and love the feeling of the heightened room, we wanted to fine an element of design for the ceiling without closing it back in. So we are using those homes as our inspiration for our floor joist ceiling. Our wood floors in our home are 1 x 8 pine onto of subfloor, and the wood we are putting up are 1 x 4, so clearly a little different but we are loving the look so far. It will take a while to do this throughout the whole house because it is a tedious process but I am so excited all of our ceilings will look like this. We started in the kitchen, which is the photos you are seeing here. However, we will eventually have this in the entire house so I will plan to share more photos of it through our home!
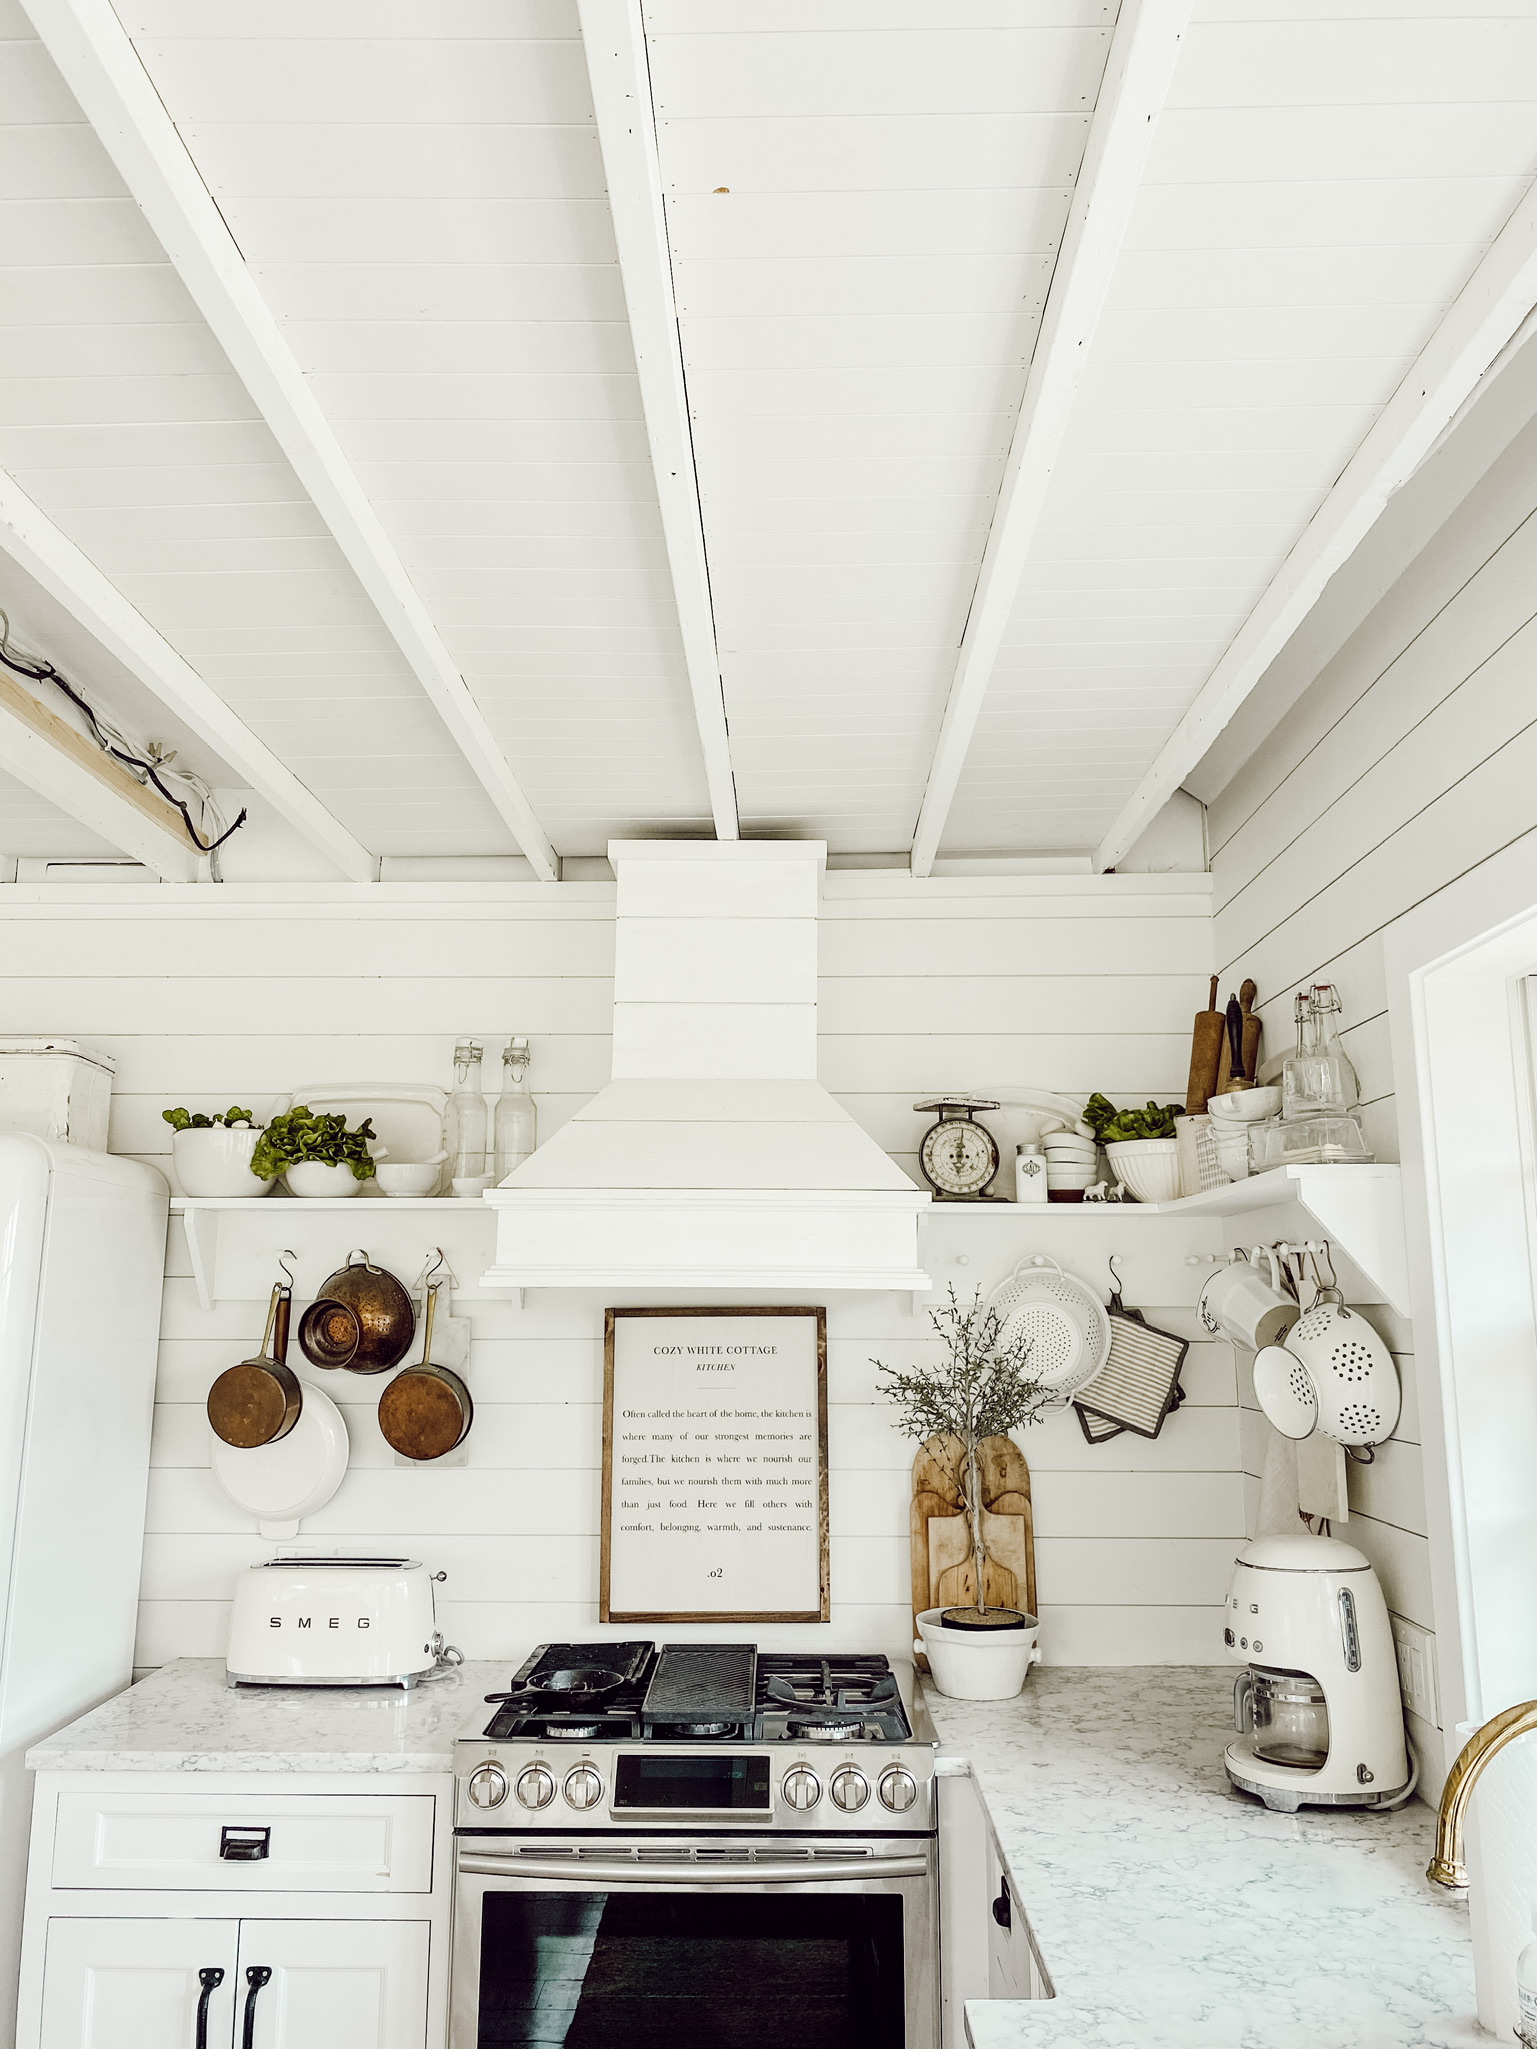
The elements we are adding gives the ceilings more of an architectural detail and adds more of a historic feel to the home. When we first removed the ceilings we didn’t know what was underneath them. We had a lot of wires running across the ceilings and I love that this new detail will hide those wires and give a cleaner look. We also love that its just 1 x 4 butted up next to one another and not tongue and groove. This will be very helpful if we want to move lighting around, add electrical, or relocate or repair plumbing. We can just pop off the boards we need to gain access too, without having to start at an end and work our way inward.
Materials:
2 inch nails (my finish nail gun is 18 ga)
1 x 4 primed MDF (actual dimensions 3/4″ x 3 1/2″): to create planked look between joists
1 x 8 Pine (actual dimensions 3/4″ x 7 1/4″): to be ripped down to create furring strips
***this was more cost effective than purchasing 1 x 2’s, but requires a table saw, if you don’t have a table saw, purchase 1 x 2 pine.
Tools Needed
Miter Saw
Nail Gun
Table saw (optional ~ see material list above)
*Additional cutout tools like Jigsaw, Spade Drill Bit, Dremel, or Multi-Tool Oscillating cut tool, maybe helpful for cutting MDF or furring strips around objects or creating cutouts for plumbing and electrical boxes.

How to Create the Look
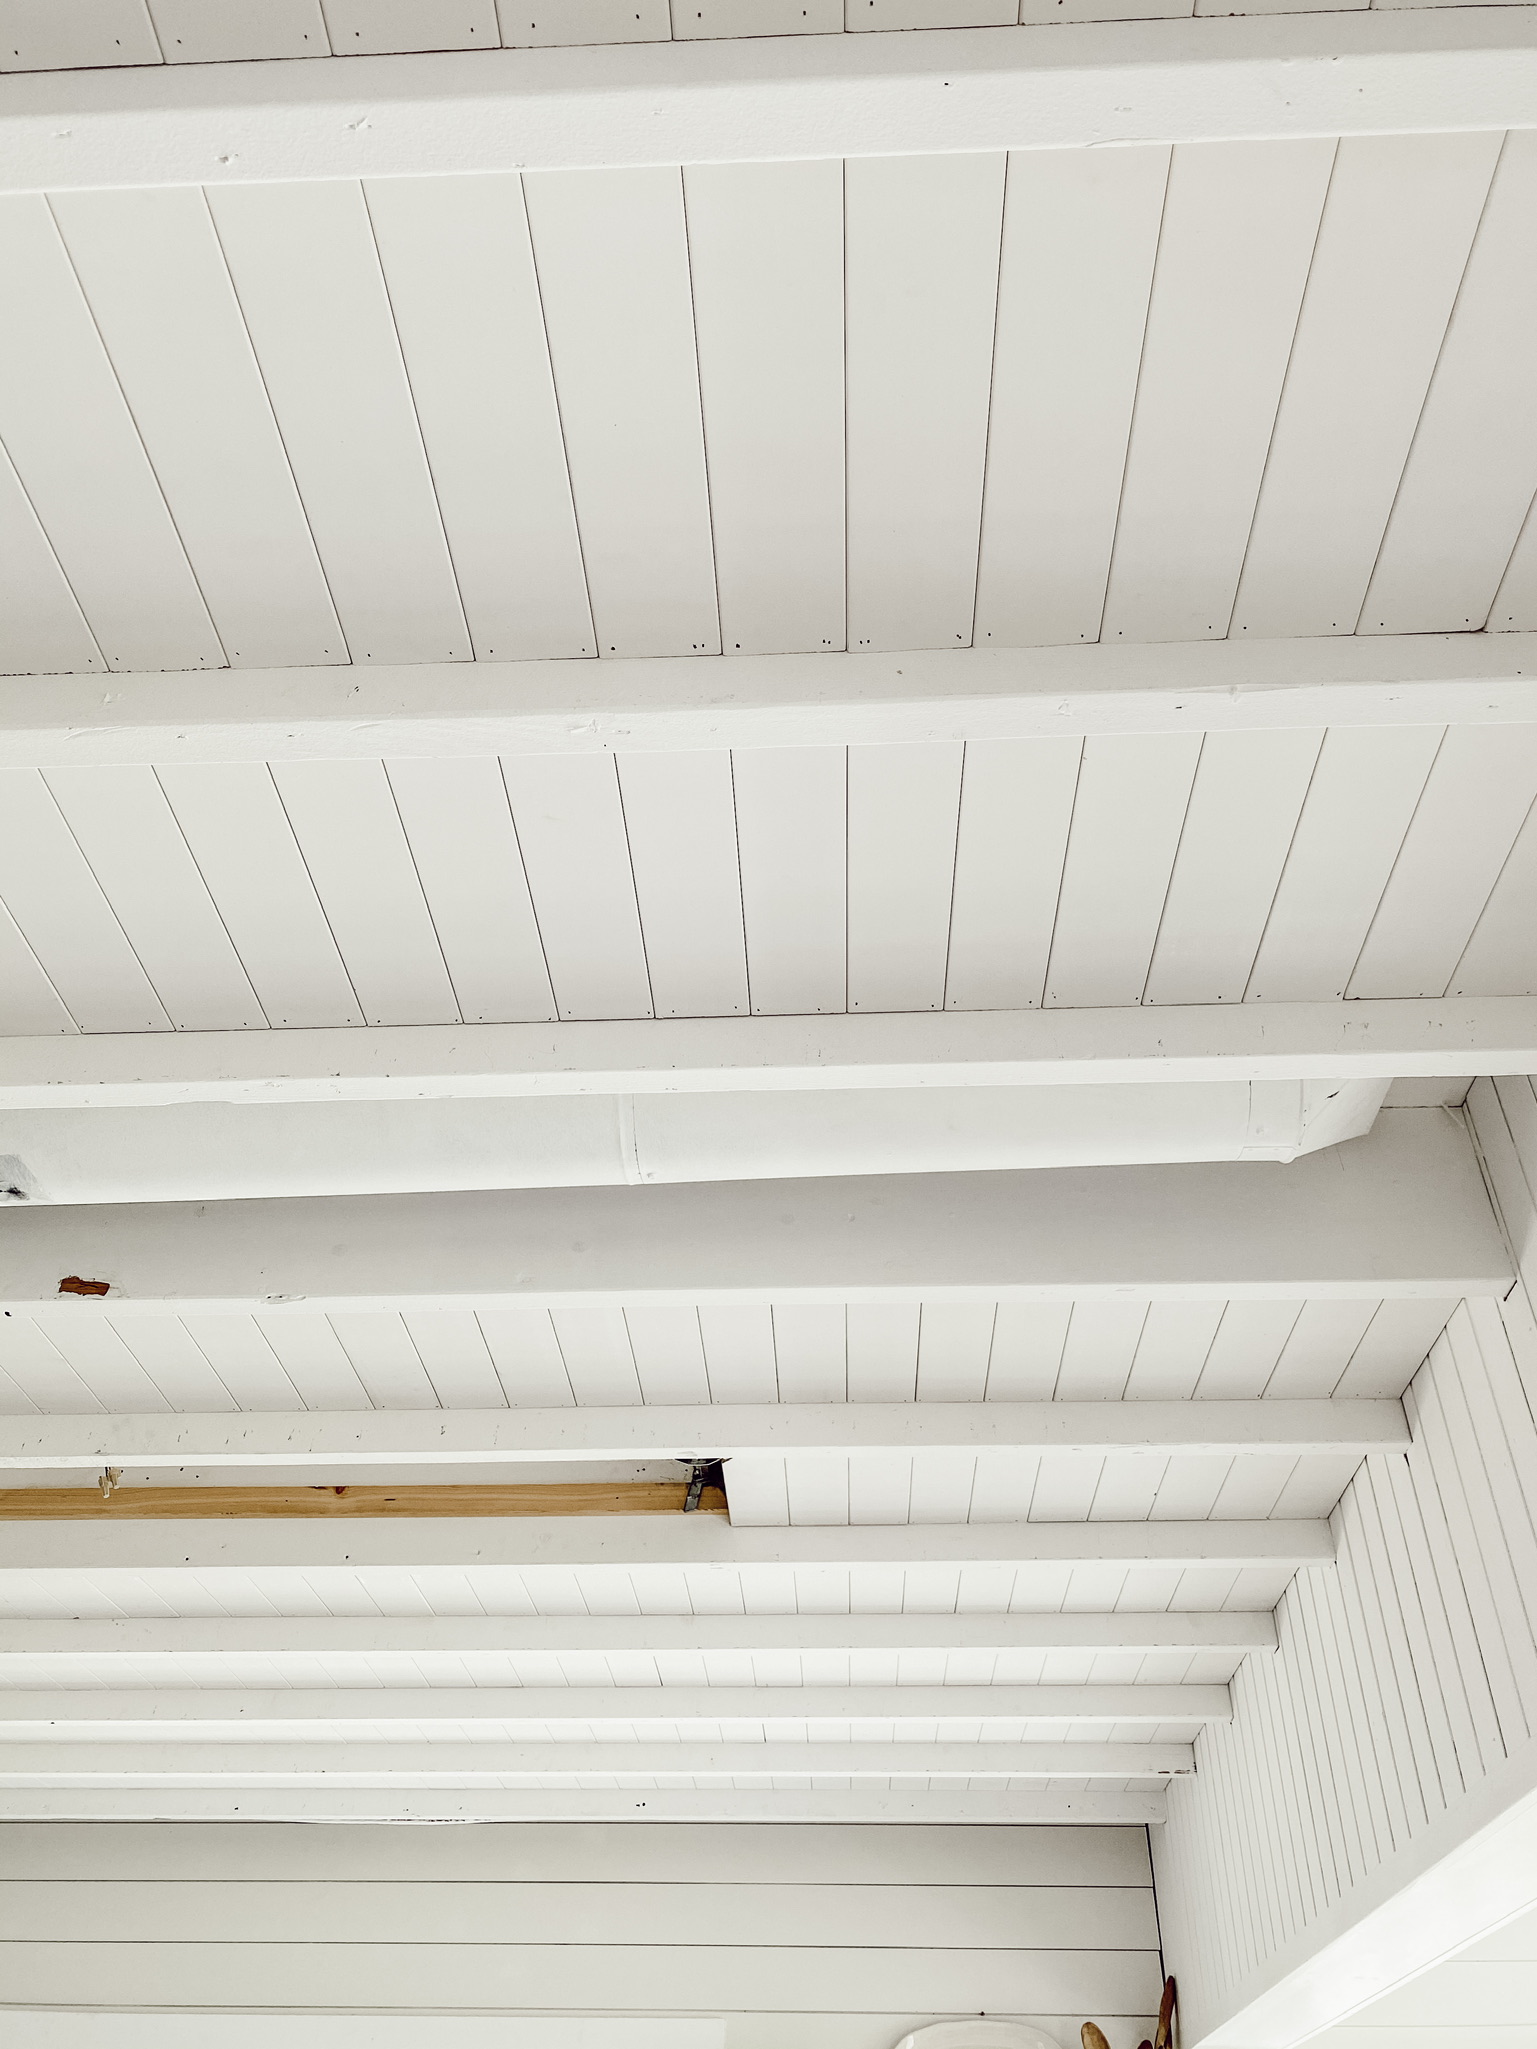
- You need something for the planked 1 x 4 to attach too. So we ripped a 1 x 8 into strips of 1 x 1 3/4 (the last board remaining board is a little closer to 1 x 1 5/8 but it’ll work), and we called them our furring strips.
- Next, measure up from the face of the floor joist, 3 inches. Attach the previously ripped furring strips, across the inside of the floor joist, with the lowest part of your furring strip at the 3 inch mark. Once the 1 x 4 MDF is attached, the section of the floor joist that is visible is called the reveal. Withe the lowest part of the furring strip at three inches, and an actual thickness of 3/4″ from the 1 x 4 MDF, the reveal is 2 1/4 inches from the face of the planked 1 x 4 MDF to the face of the bottom of the floor joist. We felt this was a good amount of reveal, but canvas your space to see if any electrical or plumbing will interfere with this placement and adjust accordingly.
*Tip- Build a Furring Strip Placement Template: We cut a scrap piece of wood into an “L”, With the inside (vertical) measurement of the “L” to be three inches. This allowed us to rest the furring strip onto of the long (vertical) part of the “L” and rest the top of the (horizontal) shorter part of the L on the face of the floor joist, to ensure we hit 3 inches perfect without having to repeatedly pull out our tape measure. Continue to run your “L” template along the face while holding down your furring strip to the top of it, you’ll nail the same 3 inches perfectly from one end to
the other. - Before you cut any 1 x 4’s take four measurements between your floor joists to locate any changes in the width between each joist. Measure your starting point, quarter, half, three quarter, and end. You may notice the measurements may get more narrow, wider, or a little mix of both. This will play into how many boards you can cut at once. For little changes between joists, I found it safe to cut and produce 12 boards before remeasuring and changing my cut stop at the miter saw. There was one that narrowed so much, I only cut two or three boards at a time before remeasuring.
- Once you have boards ready, start at the same side each time and nail each board in place to the furring strips. Since these are MDF, I used scrap pine as a buffer between the MDF 1 x 4 and hammer to save it from any damage from directly hitting it with the hammer. I only nailed these boards in place, and did not glue, but you could throw a bead of glue on the furring strips, as well as nailing them in place.
- Wash and repeat.

I am really loving the way this has turned out so far. It is a super tedious project that Jose has been working on but we both are so excited to finally be doing this! You can check out my previous post all about our open-concept ceilings here. Thank you so much for stopping by the blog today and every day.