
Hello Liz Marie Blog Readers! I’m Hannah from We Lived Happily Ever After, and I can’t tell you how thrilled I am to be here!
I have a super fun tutorial for all you animal lovers. Today I’m going to share with you how to make your own Stuffed Animal Deer Head.


I recently designed my daughter June’s room in a Rustic Prairie Theme (see the whole space HERE), and one of the biggest highlights of the room was all of the DIY’ed animals I made (like this bear rug for $6 found HERE)
I love Stuffed Animal Taxidermy. It’s a fun way to showcase your love for animals without hurting any of them. And lets face it, they look so adorable!

To make your own deer, you will need to download the below pattern.
As far as pattern assembly goes, the only pattern pieces that need to be attached before using are the two head pieces.

My terms of use are included in the download folder, but please don’t redistribute or sell this pattern and/or items made from this pattern & tutorial.
Next, you will need:
-A pair of Antlers
-A Drill
-Wood for the Plaque & Stand
(I used a 1×4″ for the plaque and a 1×2″ for the stand)
-Staple Gun
-Fabric for the Deer
(I used Burlap for the face, and Faux Fur for -the chest and ears)
-Black Felt for the eyes and nose
-1 bag of Poly-Fill for stuffing
-And finally a Needle & Thread and a Hot Glue Gun.
%2Bcopy.png "Super easy DIY deer head! 61833.showitstaging.com")
The first step to our DIY Deer Head is building the frame for the antlers. My husband has a box of antlers he collected when he was growing up, so we used a pair of them for this project.
Cut a 1×4″ into a 3.5-4″ block as shown above. Set aside.
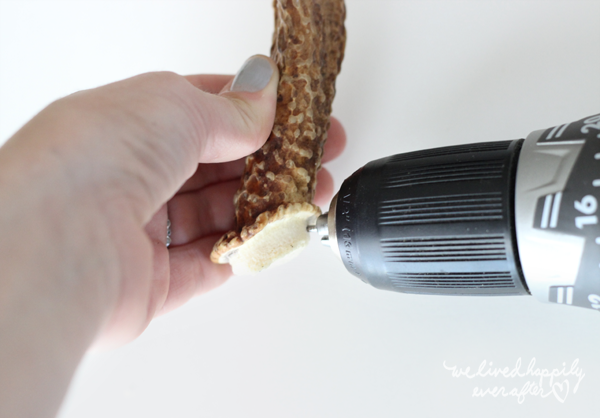
Next, you need to use your drill to pre-drill holes into the antlers. This step is very necessary, because bone is much harder than wood, and you won’t be able to screw directly into the antlers.
By the way, I would not recommend drilling into your hand – the above photo is for illustrative purposes on where to drill – not how to do it. Taking pictures while balancing a pair of antlers and a camera is hard without an assistant. Haha! 🙂
%2Bcopy.png)
Add two screws halfway into the block where the antlers should go. Then, one at a time, place your pre-drilled antlers onto the screw and gently attach using your screwdriver drill.
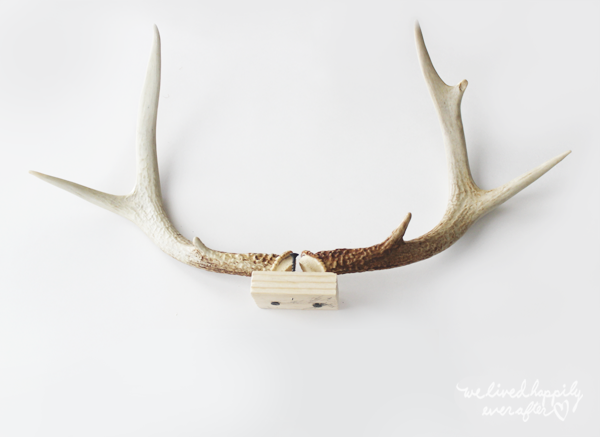
They don’t have to be super tight, but just make sure they are securely attached to the board.
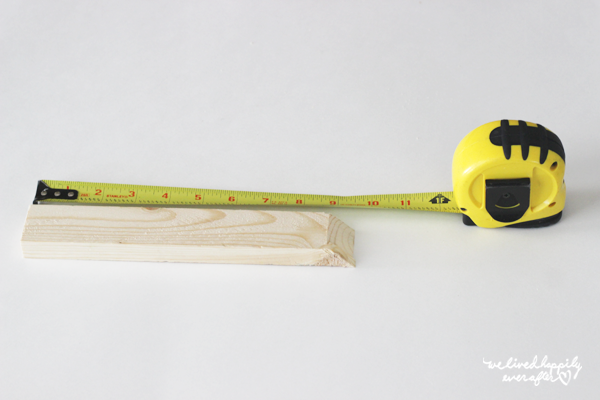
Next, cut your 1/2″ board to about 10″ long, with a 45 degree angle that tips at about 10″

Pre-drill a third screw halfway into your antler plaque.
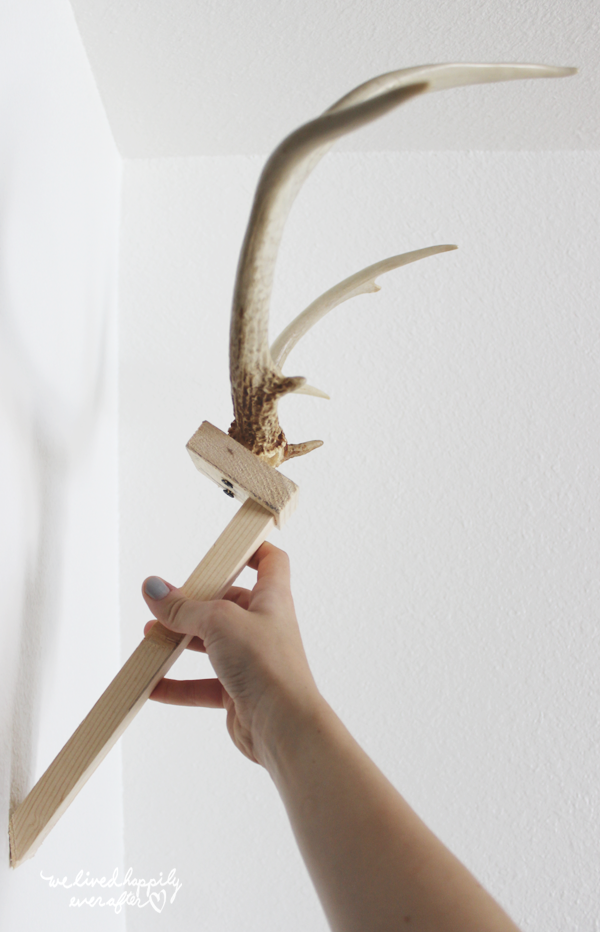
Attach the 1×2″ to the plaque as illustrated above, with the 45 degree angle on the bottom, facing the wall.
Now we need a plaque to attach our antler creation onto.
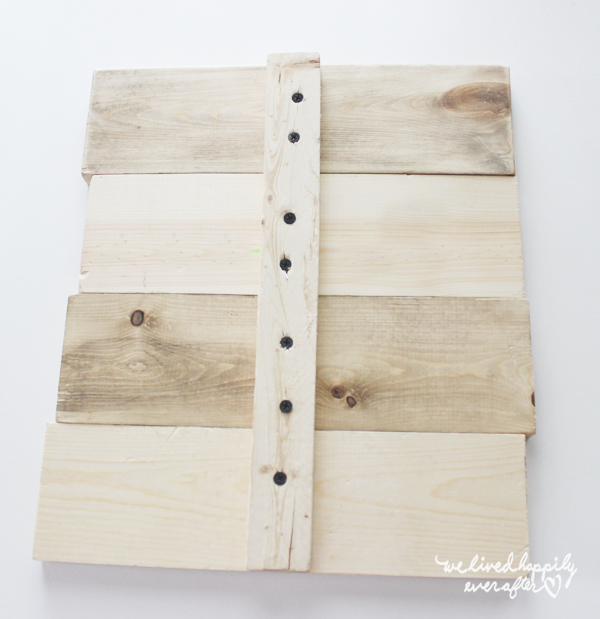
I screwed 4 12″ long 1×4″ boards together using the 1×2″ board on the back.
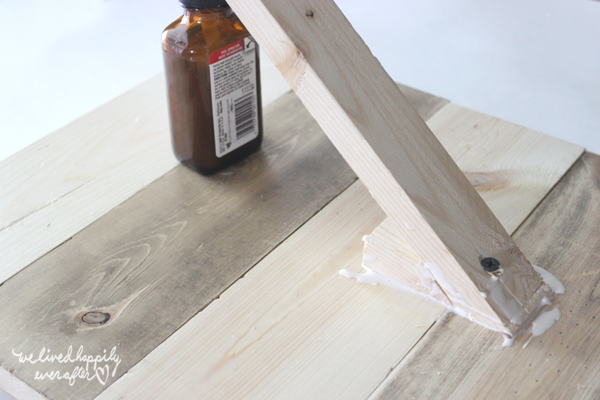
Now that we have a solid plaque, we can screw the 45 degree angled board to the other boards. You can prop it up using another 45 degree angled board, attaching it with wood glue.
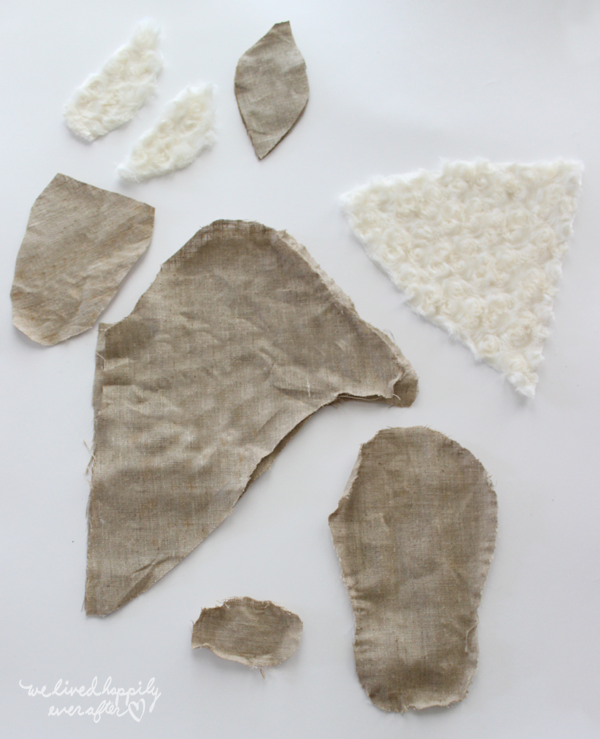
Now for the sewing part! Each pattern piece will tell you not only what color the pieces should be, but how many of them to cut. Cut out as indicated.
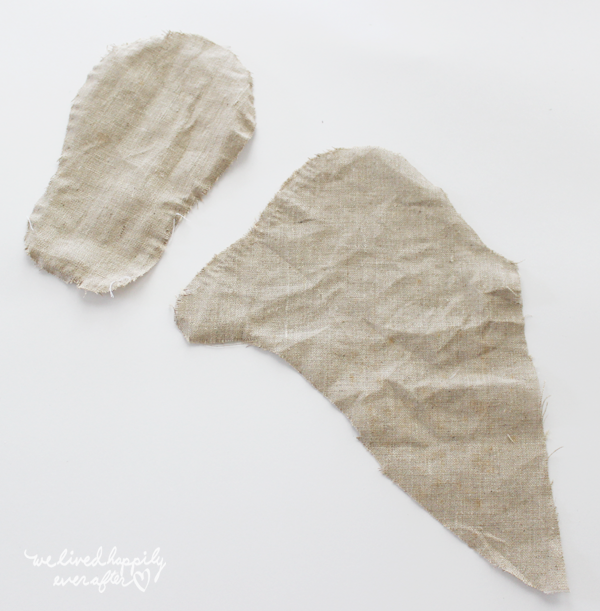
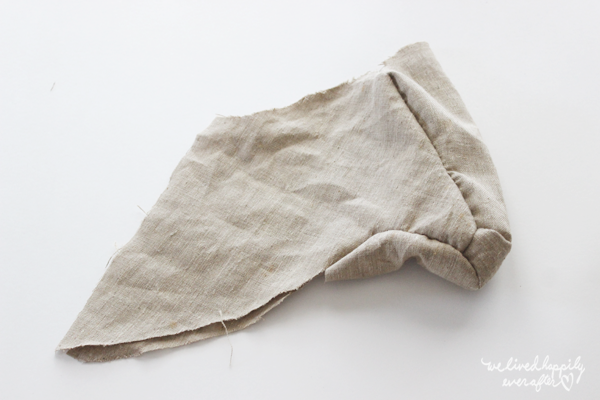
We will start off the sewing with the face pattern piece & one of the head pattern pieces.
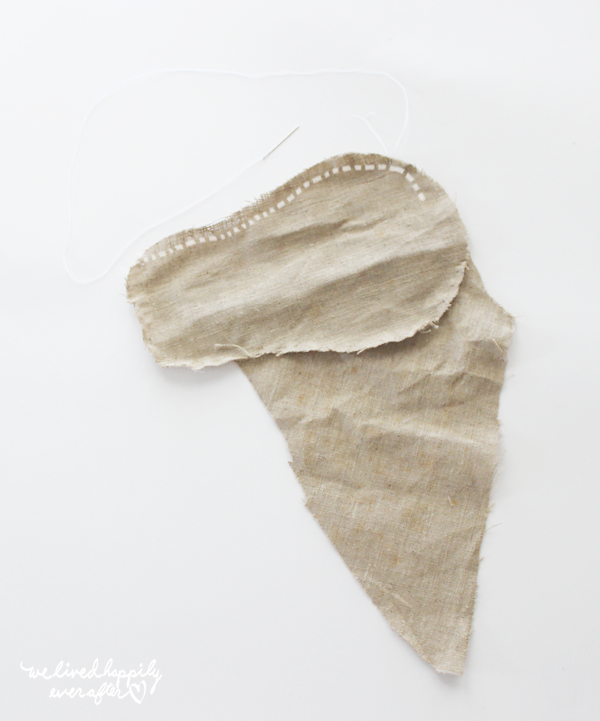
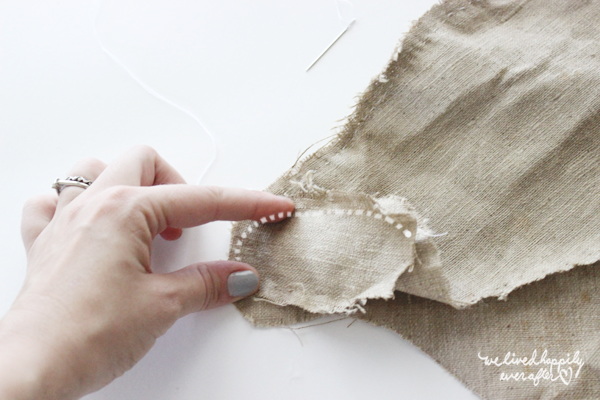
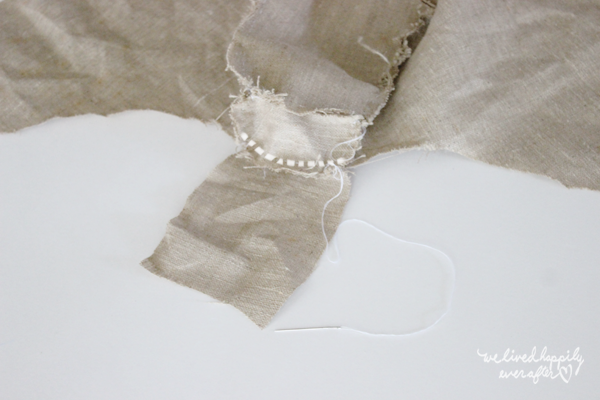
Lay the face piece on top of the head piece and sew the outer edge together, as illustrated by the dashes in the above photo.
Now sew the nose piece to both the head and face piece.

Next, add the second headpiece and sew it onto the face and nose piece.
There should be one un-sewn edge on the nose piece. This is where we need to attach the neck piece.
Here are the 5 pieces all sewn together.
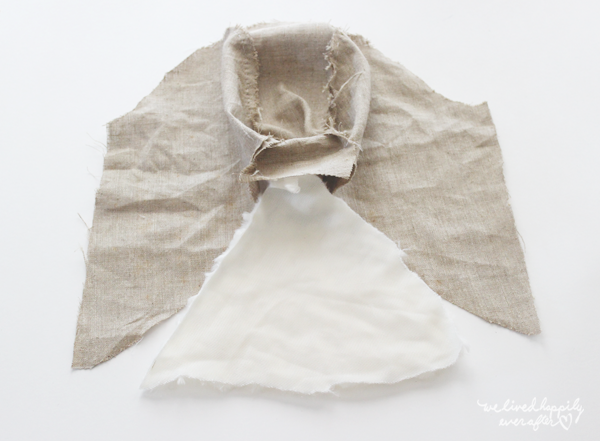
Now you can turn your creation inside out and attach the chest.
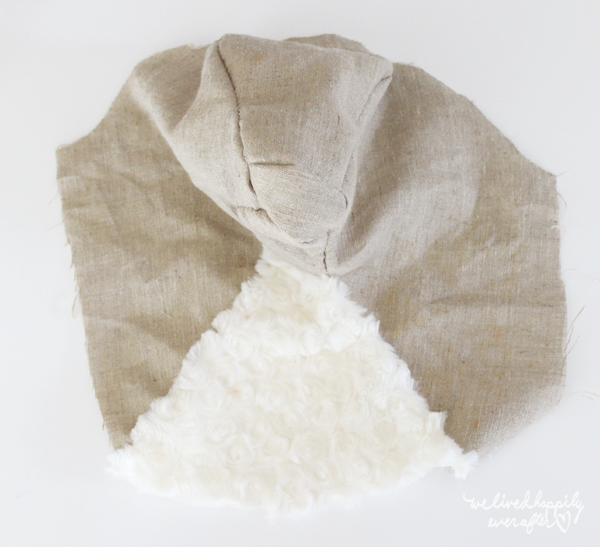
Here is the deer with the chest sewn on, turned right side out.
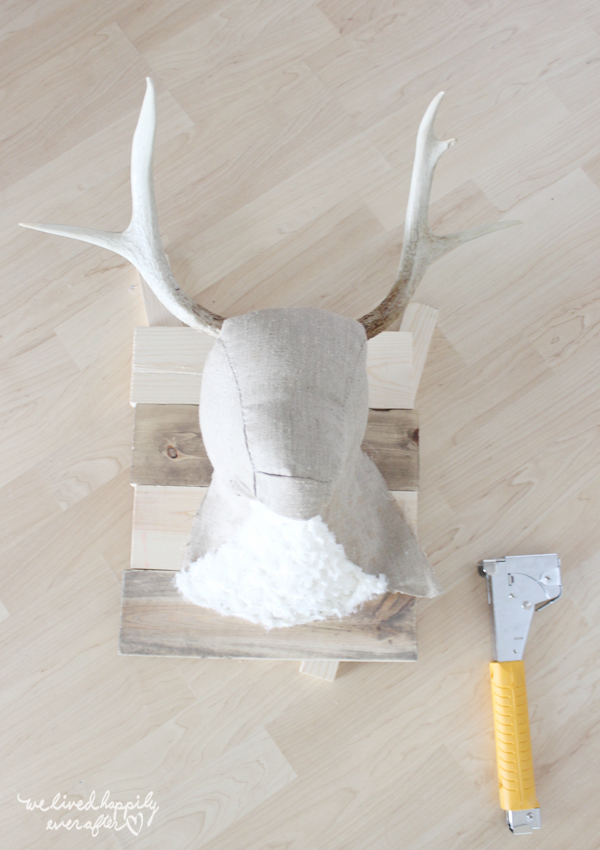
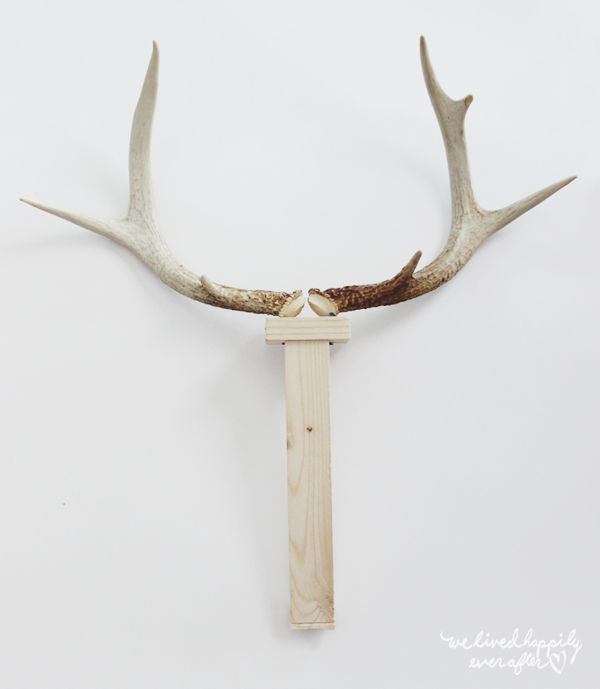
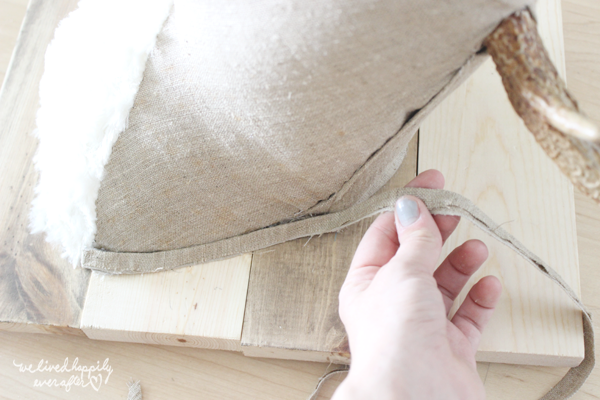
Now for the exciting part. Drape your deer head over the antler frame. Partially stuff it so that you know where to staple it in place.
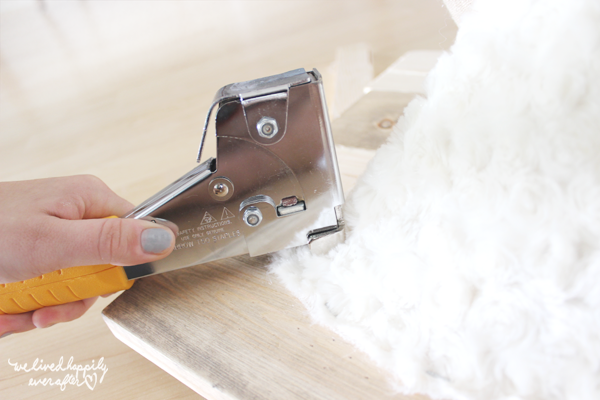
I just went around stapling with a 1 inch hem allowance. Try to make the deer as centered and symmetrical as possible.

Here is what it looked like after I added the staples to the chest. Now we need to cover up that open hole in the back.
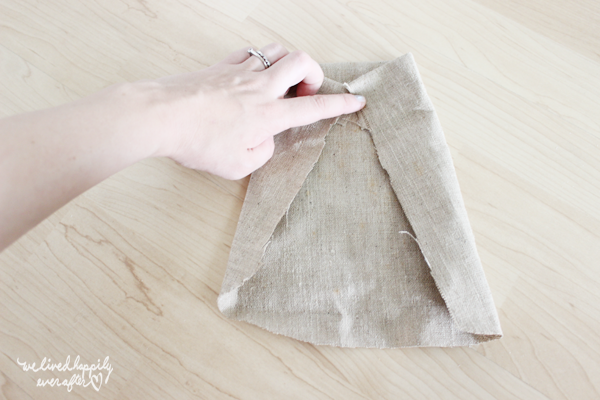
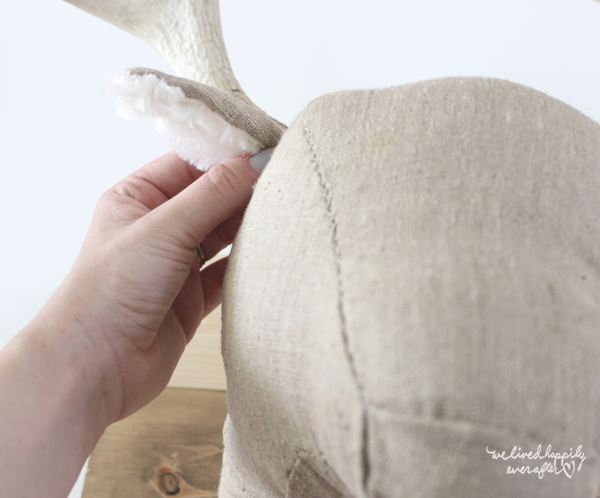
This is a piece that I didn’t include in the actual pattern, because it’s size depends on how much you stuff your deer, and the placement of your antlers. But basically you need to cut out a square of fabric to cover the back of the head, and attach the shoulders to the plaque. Mine was about 8″ – 12″ long.
I just folded it into this triangle-ish shape to give it straight hems.

Then I attached it to the top of the head, covering the antlers.
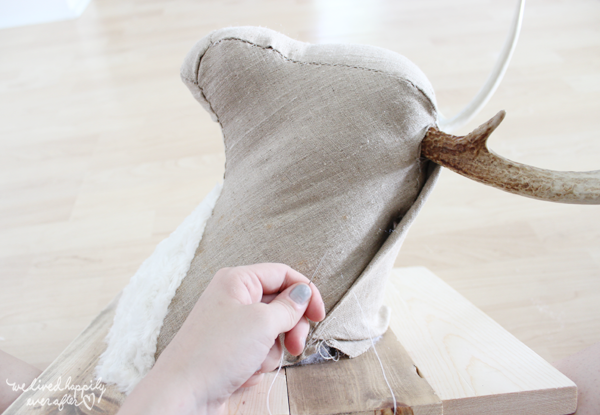
Lastly, sew the triangle’s edges to the rest of the deer to completely seal up the deer.
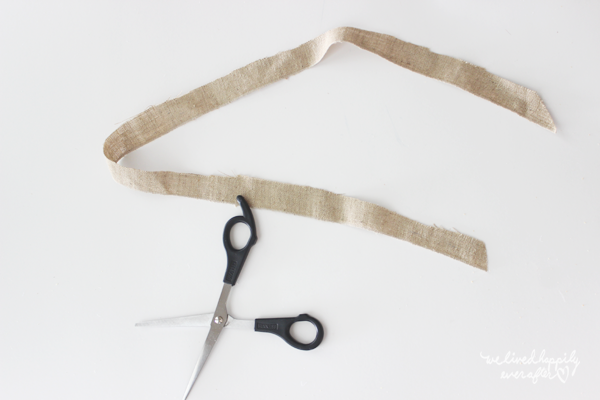
Now we are going to create a strip to go side the edges and hide all the messy staples.
To give the strip crisp edges, fold the edges behind the strip, and iron it so that the crease stays permanent. Lastly, hot glue the edges to the deer head.

Next sew the ears together by placing one brown, and one white piece together with their fronts facing each other. Leave the bottom un-sewn. Turn inside out & repeat with the second ear.
Sew onto the deer’s head.

Now all that’s left to add are the eyes and nose! You can use felt or even black tape for this step.

 Now all that’s left for you to do is enjoy your new Deer Head Decor!
To see more projects from June’s room, visit this post HERE or visit my project gallery HERE.

Oh my gosh it’s so cute! Really the whole room is, I love the rug. Pinned for a day I have time to tackle this much sewing!
The WHOLE room is so sweet. I LOVE the deer, all the stuffed animals and the little teepees. My boys had a teepee and had so much fun playing and reading in it. x
Yikes, looks like the PC Police crashed the comment party!
Personally, I think this is an adorable project! It’s also fun to see Liz welcoming guest bloggers 🙂
Hannah this room is adorable! My sister and I had play teepees when we were growing up and they were the source of hours of fun. And I’m loving all the animals. I have a daughter who ADORES animals and she would surely love this – because they’re stuffed and not real. 🙂
Wow, I LOVE the deer head decor craze, but this one is by far my fav! How stinking cute! The whole room is to die for! Good job Hannah!
You blow my mind with your talent Hannah….I LOVE this room so precious…xo
How adorable! Love the deer and the whole room looks amazing! What a lucky little girl!
OMG, so cute!! :o)
Tania
Are you kidding me!? Your stuffed animal designs are so fun…like SO fun! It’s truly amazing to me your talent! This is something I’d dream of making in my head but wouldn’t have the slightest clue how to actually create it on my own. I’m truly impressed! Thanks for sharing!!
Love this! Where did you find the antlers hannah?
Hi Sarah! My husband actually found them in the woods when he was growing up, so it’s really his personal contribution! XO
You are so sweet! I had a blast making them and I am so excited that they turned out just like I imagined them! Thanks! 🙂
Thanks! XO
Thanks Danielle! The teeppee is one of my favorites as well! So much fun for her to play in! XO
Thanks! 🙂
Aww! Thanks Lucy! You always inspire me too!
Thanks Rachel! I can’t get over how great it turned out either! 🙂
Thanks Shannon! The most important part about the room, for me, is the memories that my little girl will have from it! XO
Thanks! 🙂
Thanks! 🙂
Love, love, love this! Thank you so much for sharing your pattern and tutorial. I’m doing a woodland themed room for my daughter and I’ve pinned several of these, but didn’t just LOVE any one of them. And I love the idea of DIYing one. My husband also has some antlers collected, so this will be perfect!!
OMG, this is SO cute! We have a small boy and this would make the perfect addition to his room. We are a big hunting family, and this would be a great way to include him and get him interested in it. Thanks so much for sharing! LOVE it!
[…] deer head is wearing cute flowers, awww…and it even includes real antlers! Check out the DIY here. The same website also has a tutorial for an awesome mounted buffalo head, so if you want to […]
[…] you have the perfect spot on your wall for a DIY Deer Head…this is a cute one! Follow the picture tutorial on Liz Marie Blog and you’ll be all […]
This is really so beautiful! I want to make this! Thank you so much for the pattern!!
[…] I spent several weeks searching for just the right deer head. I even thought about buying a plush deer, cutting the head off (morbid, I know) and mounting it myself. After a while I just kind of gave up on the idea, until one day I found an awesome DIY tutorial at Liz Marie Blog! […]
[…] little girl doesn’t need fake dead animals on her wall? There is a faux taxidermy deer head tutorial that I have my eye on, and then there are these patterns by While She Naps that I have had my eye […]
[…] DIY Deer Head by We Lived Happily Ever After […]
[…] DIY Deer Head by We Lived Happily Ever After […]
cool
Really good info. Thanks!
For these factors, amongst other people, web sites like urbanhotlist have turn out to be well-liked with customers.
And while there are just too many aspects of the cigar world to consider for this article, I thought I might give a few pointers in the way of the all-important cigar lighter, possibly the most important cigar accessory you can own (tied with the humidor of course).
Scree collars are not a component that you can just replace anytime.
Look here how cheap it costs! Have a 150-300 word post costs 1.5$ nothing more Find here
Supersonic CDN show it
Hannah — I’m a grandmother expecting her first granddaughter! BUT I have no sewing skills — would you be willing to create one of these beautiful deer heads for my sweet granddaughter’s upcoming arrival? or do you know someone who can put it together for me? Love your talent, love your beautiful ideas…Beth